Windows Driver Model >> Assembly
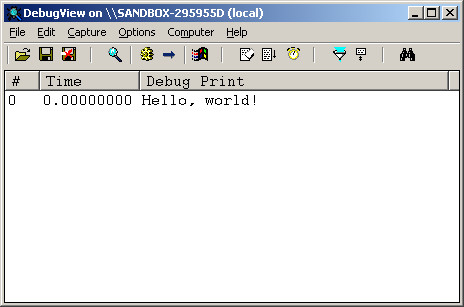
Hello, world!
參考資訊:
1. Four-F
2. Source Code
使用Assembly語言寫驅動程式是一件相當挑戰的事情,畢竟討論資源相對稀少,加上Assembly語言的可讀性比C/C++差以及Microsoft提供的Include及範例程式都是以C/C++語言為主,因此,比較少聽過有人使用Assembly語言開發WDM驅動程式,雖然困難重重,不過若能排除這些困難,自己重頭慢慢建立一支組合語言WDM驅動程式,細心品味Assembly語言的優雅,那將是一件意義非凡的事情。Microsoft Assembly語言經過多次改進,目前已經可以支援高階語法,如:If、While、Struct等語法,已經越來越高階,所以不該再把Assembly語言,想像是落後的語言,想對每個細節的瞭解,Assembly語言還是最佳的選擇,司徒接著就介紹如何使用Assembly語言寫一支Hello, world!驅動程式,畢竟Hello, world!還是最經典以及簡單的入門首選。
main.asm
.386p
.model flat, stdcall
option casemap:none
include c:\masm32\include\w2k\ntstatus.inc
include c:\masm32\include\w2k\ntddk.inc
include c:\masm32\include\w2k\ntoskrnl.inc
include c:\masm32\include\w2k\ntddkbd.inc
include c:\masm32\Macros\Strings.mac
includelib c:\masm32\lib\wxp\i386\ntoskrnl.lib
public DriverEntry
.const
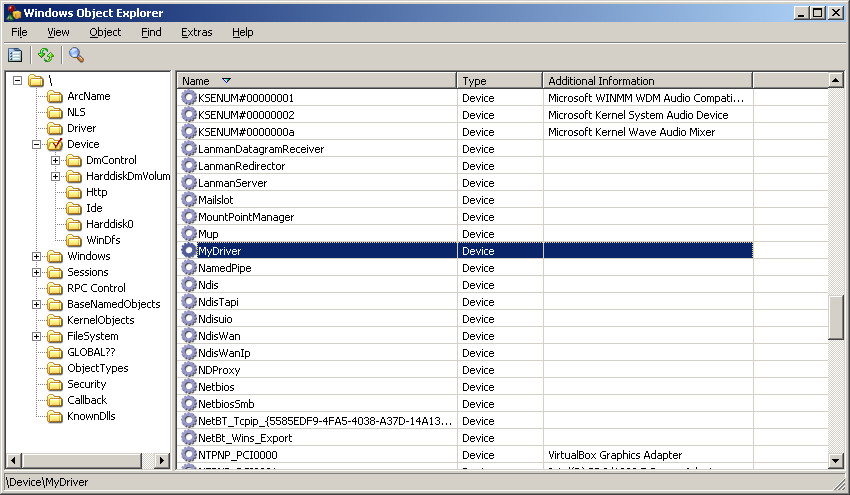
DEV_NAME word "\","D","e","v","i","c","e","\","M","y","D","r","i","v","e","r",0
MSG byte "Hello, world!",0
.data
pNextDevice PDEVICE_OBJECT 0
.code
AddDevice proc pOurDriver:PDRIVER_OBJECT, pPhyDevice:PDEVICE_OBJECT
local pOurDevice:PDEVICE_OBJECT
local suDevName:UNICODE_STRING
invoke DbgPrint, offset MSG
invoke RtlInitUnicodeString, addr suDevName, offset DEV_NAME
invoke IoCreateDevice, pOurDriver, 0, addr suDevName, FILE_DEVICE_UNKNOWN, 0, FALSE, addr pOurDevice
invoke IoAttachDeviceToDeviceStack, pOurDevice, pPhyDevice
push eax
pop pNextDevice
mov eax, pOurDevice
or (DEVICE_OBJECT PTR [eax]).Flags, DO_BUFFERED_IO
and (DEVICE_OBJECT PTR [eax]).Flags, not DO_DEVICE_INITIALIZING
mov eax, STATUS_SUCCESS
ret
AddDevice endp
Unload proc pOurDriver:PDRIVER_OBJECT
ret
Unload endp
IrpPnp proc pOurDevice:PDEVICE_OBJECT, pIrp:PIRP
IoGetCurrentIrpStackLocation pIrp
movzx eax, (IO_STACK_LOCATION PTR [eax]).MinorFunction
.if eax == IRP_MN_START_DEVICE
mov eax, pIrp
mov (_IRP PTR [eax]).IoStatus.Status, STATUS_SUCCESS
.elseif eax == IRP_MN_REMOVE_DEVICE
mov eax, pIrp
mov (_IRP PTR [eax]).IoStatus.Status, STATUS_SUCCESS
invoke IoDetachDevice, pNextDevice
invoke IoDeleteDevice, pOurDevice
.endif
IoSkipCurrentIrpStackLocation pIrp
invoke IoCallDriver, pNextDevice, pIrp
ret
IrpPnp endp
DriverEntry proc pOurDriver:PDRIVER_OBJECT, pOurRegistry:PUNICODE_STRING
mov eax, pOurDriver
mov (DRIVER_OBJECT PTR [eax]).MajorFunction[IRP_MJ_PNP * (sizeof PVOID)], offset IrpPnp
mov (DRIVER_OBJECT PTR [eax]).DriverUnload, offset Unload
mov eax, (DRIVER_OBJECT PTR [eax]).DriverExtension
mov (DRIVER_EXTENSION PTR [eax]).AddDevice, AddDevice
mov eax, STATUS_SUCCESS
ret
DriverEntry endp
end DriverEntry
.end
程式很簡單,算是一個簡單的框架,使用者可以善加利用。
DriverEntry()只有做Callback設定的動作,基本的設定(不處理任何事情)需要AddDevice、PNP、Unload這三個Callback。
AddDevice()會產生一個Device Object,用來管理新加入的裝置(純軟體虛擬裝置也算),最後初使化相關旗標。
IrpPnp()主要是處理移除Device Object的動作,其餘Irp不處理,直接往下傳遞。
Unload()沒有處理任何事情。
配置或者刪除資源一定是成雙成對,在AddDevice()配資源就會在PNP(IRP_MN_REMOVE_DEVICE)釋放資源;而在DriverEntry()配資源就會在Unload()釋放資源,這是基本的準則。
main.inf
[Version]
Signature=$CHICAGO$
Class=Unknown
Provider=%MFGNAME%
DriverVer=8/21/2019,1.0.0.0

[Manufacturer]
%MFGNAME%=DeviceList

[DeviceList]
%DESCRIPTION%=DriverInstall, *MyDriver

[DestinationDirs]
DefaultDestDir=10,System32\Drivers

[SourceDisksFiles]
main.sys=1,,,

[SourceDisksNames]
1=%INSTDISK%,,,

[DriverInstall.NT]
CopyFiles=DriverCopyFiles

[DriverCopyFiles]
main.sys,,,2

[DriverInstall.NT.Services]
AddService=FILEIO,2,DriverService

[DriverService]
ServiceType=1
StartType=3
ErrorControl=1
ServiceBinary=%10%\system32\drivers\main.sys

[DriverInstall.NT.HW]
AddReg=DriverHwAddReg

[DriverHwAddReg]
HKR,,SampleInfo,,""

[DriverInstall]
AddReg=DriverAddReg
CopyFiles=DriverCopyFiles

[DriverAddReg]
HKR,,DevLoader,,*ntkern
HKR,,NTMPDriver,,main.sys

[DriverInstall.HW]
AddReg=DriverHwAddReg

[Strings]
MFGNAME="MyDriver"
INSTDISK="MyDriver Disc"
DESCRIPTION="MyDriver"
INF內容也是很制式的,我們先知道如何使用就可以,司徒之後會教導大家如何寫INF檔案。
編譯程式:
c:\masm32\bin\ml /c /coff /Cp "main.asm"
c:\masm32\bin\link /MAP /debug /debugtype:cv /nologo /driver:WDM /base:0x10000 /align:64 /out:"main.sys" /subsystem:native "main.obj"
安裝程式:
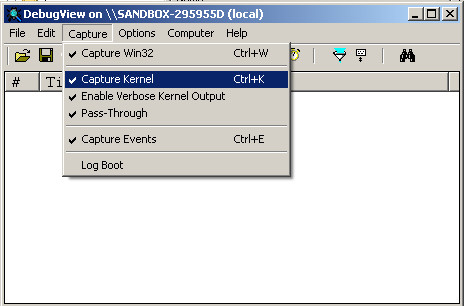
在開始安裝驅動程式之前,我們需要先下載除錯工具,讓驅動程式的Debug訊息可以顯示在除錯工具上面,目前在Kernel Mode以及User Mode上,最佳的Debug輸出訊息工具是DbgView,該公司目前已經被Microsoft併購,所以可以從Microsoft網站下載,下載完後執行DbgView並將Capture > Capture Kernel選項打勾,接著重啟DbgView
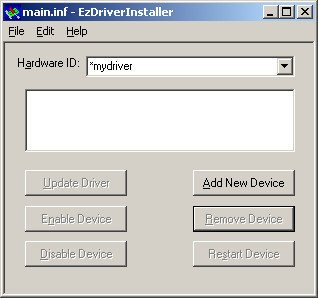
對於驅動程式的安裝工具,司徒目前先使用NuMega公司製作的安裝工具EzDriverInstaller,請將main.sys和main.inf放在同一個目錄並執行EzDriverInstaller,選擇File > Open...(開啟main.inf檔案),接著按Add New Device就可以在DbgView上面看到輸出訊息
Device Manager
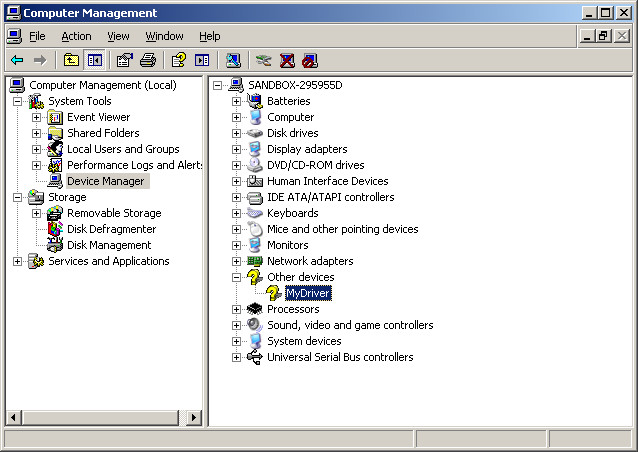
Device