Windows NT Driver >> C/C++
Hello, world!
參考資訊:
1. Source Code
main.c
#include <wdm.h>
void Unload(PDRIVER_OBJECT pOurDriver)
{
}
NTSTATUS DriverEntry(PDRIVER_OBJECT pOurDriver, PUNICODE_STRING pOurRegistry)
{
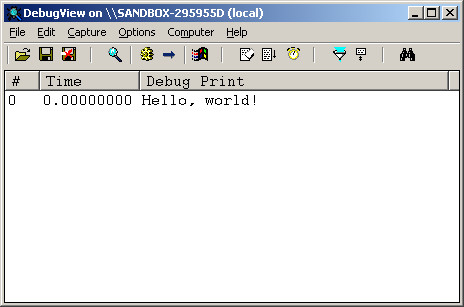
DbgPrint("Hello, world!");
pOurDriver->DriverUnload = Unload;
return STATUS_SUCCESS;
}
程式很簡單,算是一個簡單的框架,使用者可以善加利用。
Unload()沒有處理任何事情
DriverEntry()僅列印訊息和設定Unload Callback
配置或者刪除資源一定是成雙成對,在DriverEntry()配資源就會在Unload()釋放資源,這是基本的準則。
sources
TARGETNAME=main
TARGETTYPE=DRIVER
TARGETPATH=obj
SOURCES=main.c
sources會指定編譯輸出的檔名以及需要編譯的參數、檔案。
makefile
!INCLUDE $(NTMAKEENV)\makefile.def
makefile內容是固定的。
編譯程式:
1. 開始 > 程式集 > Windows Driver Kits > WDK xxxx.xxxx > Build Environments > Windows XP > x86 Checked Build Environment
2. 開啟Command Line之後,請使用cd命令移到你的目前資料夾
3. 接著輸入編譯指令:build -cefw
安裝程式:
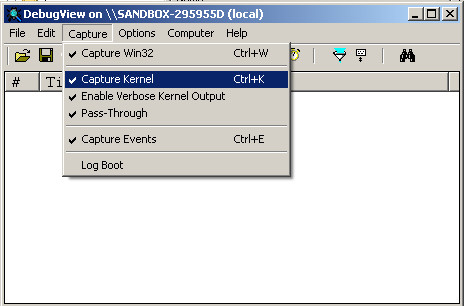
在開始安裝驅動程式之前,我們需要先下載除錯工具,讓驅動程式的Debug訊息可以顯示在除錯工具上面,目前在Kernel Mode以及User Mode上,最佳的Debug輸出訊息工具是DbgView,該公司目前已經被Microsoft併購,所以可以從Microsoft網站下載,下載完後執行DbgView並將Capture > Capture Kernel選項打勾,接著重啟DbgView
Legacy(Nt-Style)驅動程式的安裝很方便,它是使用Service的方式安裝,因此,複製main.sys到c:\windows\system32\drivers資料夾下並輸入如下命令進行安裝
c:\> sc create MyDriver binPath= "c:\windows\system32\drivers\main.sys" type= "kernel" start= "demand" error= "normal" Displayname= "MyDriver"
c:\> sc start MyDriver
P.S. 要記得在"="前面都需要一個空格。
輸入完上列指令後,就可以看到輸出的Hello, world!字串。
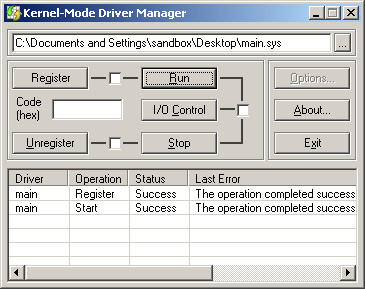
當然,使用者也可以使用Four-F撰寫的KmdManager進行安裝,開啟KmdManager後,載入main.sys後,選擇Register > Run即可